I’ve only dabbled in sewing clothing here and there, last October I actually tried my hand at making my costume. I was happy with the results but my pattern/sewing skills could definitely use some work.
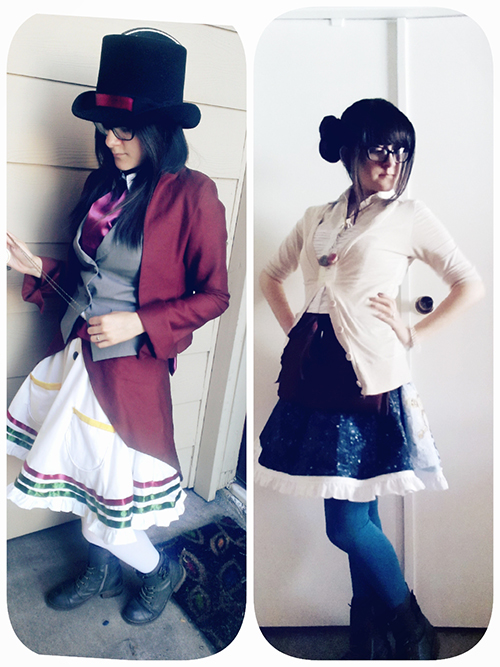
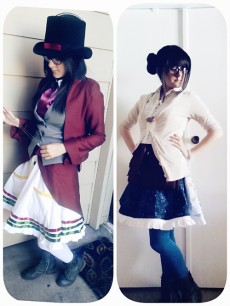 If you’ve read our recent posts you will have noticed that Mind-Speaks had the honor of being apart of a craft fair known as Pop Shop. I took this upon myself to create a half apron for the occasion and also a circle skirt for Sunday, it was Star Wars Day so I of course had to make something to celebrate. However, I did it the night before and didn’t have enough fabric so I know I could have done better if I had more time. Circle skirts sit high on the waist, but with my Halloween costume I made it sit right on my hips. I believe this skirt took 2 yards to make, the other one was probably less than a yard. If you fold it just right you will be able to get the full skirt without any seams. I on the other keep making the same mistake and always get two halves.
 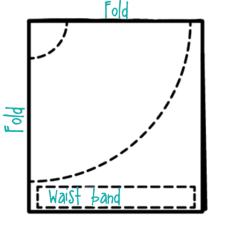 Hopefully the next time I attempt this pattern I will get it right. Not that the seams get in the way, it just means you would have an extra step of sewing the two halves together. For the Star Wars skirt, seeing as I didn’t have enough fabric, I had to use a different one for the front half.
TIP: Buy trim in bulk, it’s annoying to have to make your own, but sometimes you have to. Kudos to you if you already do. :3
I’m terrible at making patterns, so this part is always the worse for me. Along with cutting the pattern out so make sure your rotary tool is sharpened. This video helped me a lot when making my pattern. Circle skirts are really fun to wear, so I know you will have fun making/wearing one. That’s all I have for this entry. Until next time…
Thanks for reading and commenting.

This post was written by:
 KIM VERA - (view all posts by Kim)
Kim works as a museum Copywriter and helps out with events from time to time. When she isn’t working or blogging, she is probably off taking a nap. Feel free to email her at kim@mind-speaks.com
Have a tea fanatic in your life? Then this is the craft idea for you.
Great gift for Valentine’s, birthdays, or even anniversaries. This simple yet adorable gift will be sure to melt the heart of your loved one. Warm them up with a spot of tea. <3
Here are the materials you will need:
- teabags or tea leaves
- coffee filters
- Scissors
- needle
- Thread
- Craft Paper
- Chalkboard labels (optional)
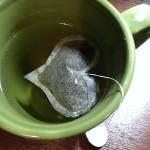
I just bought a box of different tea samples, and deconstructed the bags.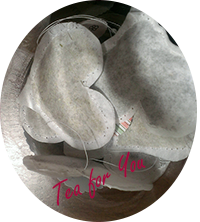 I then cut hearts out of the coffee filters and then sewed them up, filling each with different tea leaves. I love how the peppermint tea smelled. After sewing them closed, I left a long thread tail and then added a tag so that I could label each tea. In the sample box there were at least three of each type of tea, and there were I believe five different flavors.
Honey Chamomile, Sleepy Time, Lemon, Peppermint, Chamomile
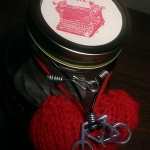
I also knitted a heart as an added decoration, along with a necklace that I had bought for my boyfriend to wrap around the jar. The artist is named Yamin, and you can find his work here. He is amazing. I also opted for a dollar chalkboard labels, obviously the chalk will rub off when the jar is handled. But it was just too cute to pass up, I’ve boarded the chalkboard train. XD Hope you enjoyed my version of the heart teabags. Let me know if you tackle this project. Would love to see your take on it.
Until next time, thanks for reading and commenting.
This post was written by:
KIM VERA - (view all posts by Kim)
Kim works as a museum Copywriter and helps out with events from time to time. When she isn’t working or blogging, she is probably off taking a nap. Feel free to email her at kim@mind-speaks.com
I’ve been wanting to paint my own R2D2 shoes after seeing these on Etsy. And I finally made time to do it and I’m pleased with how they came out.
Now mine didn’t come out as fancy, but I worked hard on them and they only cost about 15 dollars to make.
Materials used:
- Tape
- Fabric or acrylic paint
- pencil
- canvas shoes
- paint brushes/sponges
- plenty of napkins!
- modpodge/fixative
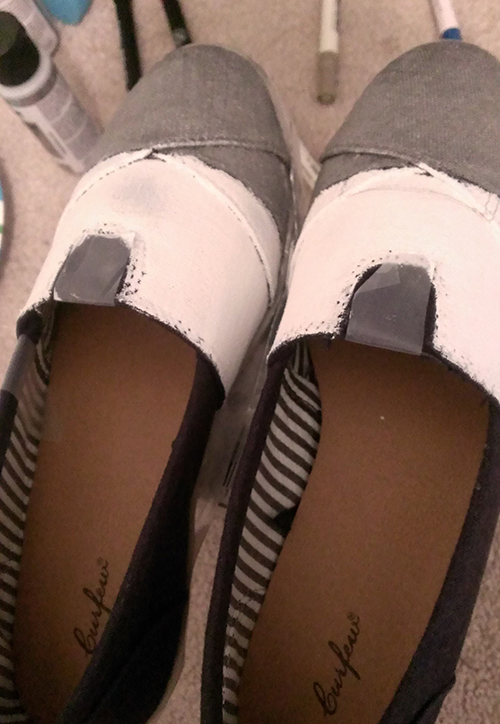
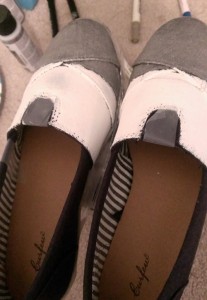 Most Etsy sellers have them priced at $40+ due to the type of shoes they use, most common are Toms. I found canvas lookalikes, called Curfew, for 10 bucks at Krogers. I wanted to purchase some van lookalikes from Walmart that were priced at 5 something. However, they didn’t have my size. But these work just as well. I used acrylic paint and also fabric paint pens to draw on the designs. I’m not an artist, but I had a lot of fun making them. What I found difficult was getting both shoes to look identical. It didn’t happen, but perfection isn’t necessary when creating. For mine, after taping up the sides of the shoes I painted the
 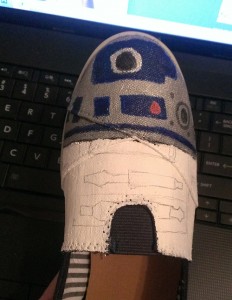 tops of my shoes a metallic silver and just under that I painted them white. I left the elastic part of the shoes on front blue. Both paints where solid enough so one to two coats were enough. After the paint dried I was able to draw on what needed to be painted blue. R2 has a bunch of stuff going on so I’m glad I was able to use a pencil. His head was a bit more difficult to draw on seeing as the pencil blended in with the silver paint. This is the part where getting both shoes to look the same became difficult. I’m not a perfectionist, so it only bothered me for a few minutes. Then, I slowly colored in the marks I had drawn with blue paint pens. You know, the kinds that you shake to get them to start working? I left the sides of the shoes alone and only painted the heals of the shoes with sparkle paint. I thought it added a little something extra to them. I had a lot of fun working on these, after completing mine I decided to make some for Mija as well.
Continuing on with the Star Wars theme, I made her some Boba Fett shoes. These weren’t as common, and a bit difficult to paint. I had bought blue canvas for my R2 shoes, and I had planned on using tan shoes for Boba, but red was the only ones available in her size. I figured since Boba has red on his helmet this would be ok. However, the red paint I had purchased was a bit too bright and therefore I had to paint over the canvas red. Still, the shoes came out alright and I’m pleased with them as well. I had no idea what to do with the sides or the heals, I couldn’t leave them red because then it could clash with the helmet. So I decided to paint the rest of the shoes black and painted stripes of yellow and grey on the sides.
Kat decided to to paint her own shoes, and seeing as she’s more of a Dr. Who fan than a Star Wars fan, she decided to make some galaxy Tardis shoes. Using the same Curfew shoes, she also bought hers in blue, she had to paint hers white before she could start adding other colors. After painting we sprayed them with hair spray, but after a day of walking in them, Kat’s had started to peel. So we decided to spray them with modpodge. I’m hoping this will keep the paint from peeling. They are easy to make, but I don’t want them to start peeling after one day of wear. That’s no fun. :I I might go over them with some paint modpodge as a reinforcement. But I know, not everything is meant to last. Also, these types of shoes create blisters, so I’d wear socks with them. Still, this was a lot of fun, and I highly recommend you trying this out for yourself.
This is a great DIY project to do with your kids, or if you’re nerdy like me then you’ll love it for yourself. Send a link to your own shoes if you decide to make some, I’d love to see what you create.
Thanks for reading and commenting.
This post was written by:
KIM VERA - (view all posts by Kim)
Kim works as a museum Copywriter and helps out with events from time to time. When she isn’t working or blogging, she is probably off taking a nap. Feel free to email her at kim@mind-speaks.com
 If you’ve read our recent posts you will have noticed that Mind-Speaks had the honor of being apart of a craft fair known as Pop Shop. I took this upon myself to create a half apron for the occasion and also a circle skirt for Sunday, it was Star Wars Day so I of course had to make something to celebrate. However, I did it the night before and didn’t have enough fabric so I know I could have done better if I had more time. Circle skirts sit high on the waist, but with my Halloween costume I made it sit right on my hips. I believe this skirt took 2 yards to make, the other one was probably less than a yard. If you fold it just right you will be able to get the full skirt without any seams. I on the other keep making the same mistake and always get two halves.
 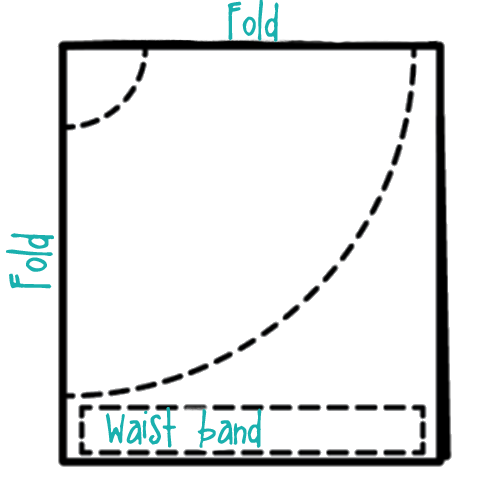 Hopefully the next time I attempt this pattern I will get it right. Not that the seams get in the way, it just means you would have an extra step of sewing the two halves together. For the Star Wars skirt, seeing as I didn’t have enough fabric, I had to use a different one for the front half.
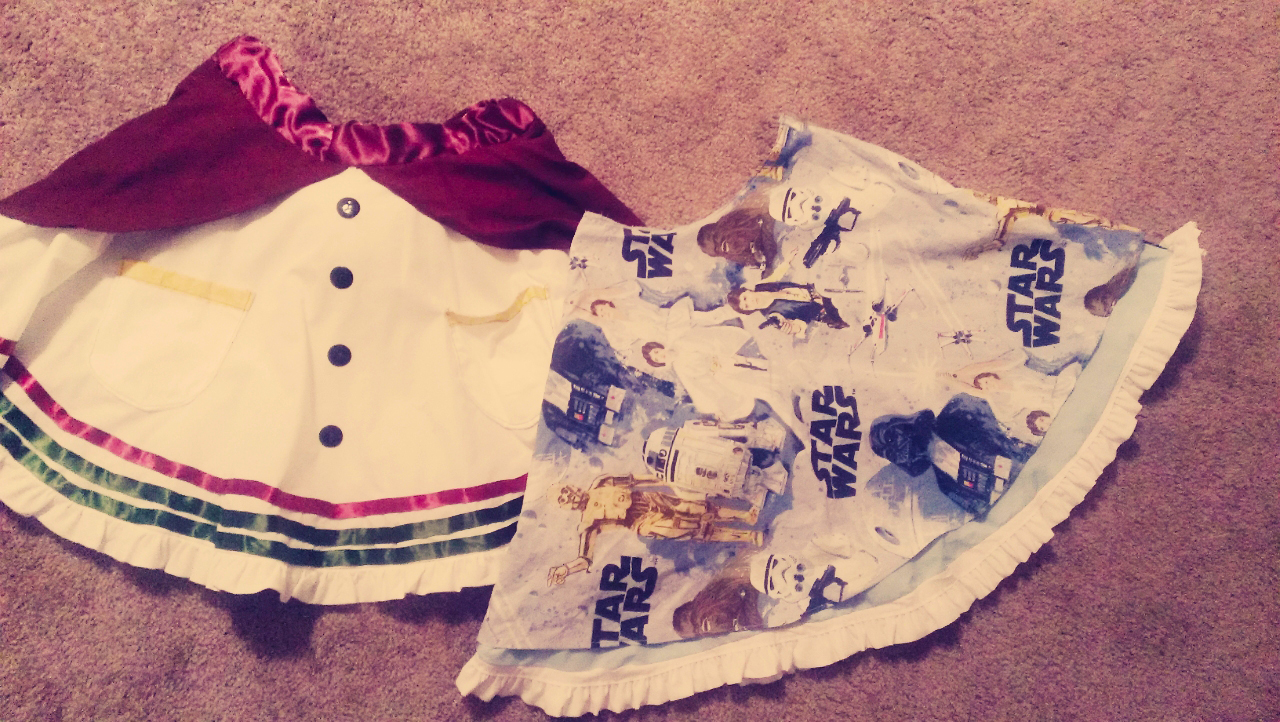


 Email
Email Twitter
 Facebook
 YouTube
 Instagram
 Bloglist Me