I alway wanted to make my own bread so I had the time and decided to make it 😀
Ingredients you will need are:
3 packages (1/4 ounce each) active dry yeast
2 cups of warm water
1 cup of sugar
1/2 cup of butter (or one stick of butter) I would use unsalted butter but I didn’t have any on hand so I used salted butter I decided to not put any salt, it turned out great so use which ever you like.
1 1/2 teaspoon salt
2 eggs, beaten
7- 3/4 cups of bread flour
First: in a bowl dissolve yeast in warm water. Add the sugar, salt, eggs, and 4 cups of flour; beat until smooth. Stir enough remaining flour to form a soft dough.
Second: Turn onto a floured surface; knead until smooth and elastic, about 6-8 minutes. Place in a greased bowl (I used extra virgin olive oil but you can use anything) turning once to grease top. Cover and let rise in a warm and let rise in a warm place until doubled, about 45 minutes. ( you can use a bread maker if you want but you don’t need one for a warm surface I used my rice cooker to help rise it.)
Third: Push down two fingers into the dough if the finger dents stay its done if not it needs to rise more. If ready punch dough down. Turn onto a heavily floured surface; divided into thirds. Shape each portion into a loaf. Place in a greased loaf pan. Cover and let rise for another 45 mins.
Fourth: Preheat oven at 350 and bake for 30 mins or until golden brown. let it cool and then Enjoy 😀
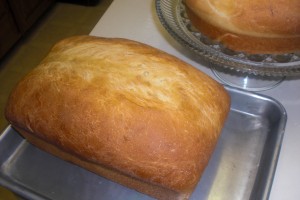
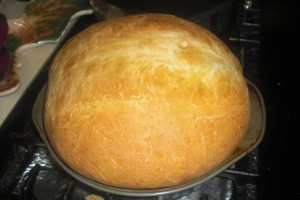
It should make three loaves I made two only cause I underestimated how big it would get lol but its very good it maybe sweet but my family fell in love with it 🙂 Hope you try it!!
This post was written by:
 KAT VERA - (view all posts by Kat)
Kat is a lead pastry chef. When she isn’t in the kitchen she’s traveling space and time with Doctor Who and solving mysteries with Sherlock. Email her at kat@mind-speaks.com
Its been a whole year of Mind-speaks.com and we do have some ideas for the new year. We plan on starting to do some craft festivals and events so if all goes well people might be able to buy prints and knitted items from us.
OK – lets start with the official post. Graduation is around the corner and mom wanted me make Kat’s commencement announcement invites. She ordered and paid for mine/Kim’s when we finished High School and the total cost us a few hundred bucks. Mom asked me to do these on a budget. No problem!!
- I picked out a linen bright white paper (80lb)
- Frosted Vellum Paper
- Bright white A7 Envelopes
- Midnight Blue 80 lb text paper for envelope lining
I took the bright white paper – printed a vector image of Kat’s mascot (pirate) and printed a vivid cover with her name and graduating year (2011). Scored and folded them. Printed the invite info (time, date etc…) inside on vellum (vector type as well). I took my favorite new tool – tape runner (invisible!) and taped the vellum with text on top of the pirate, since the tape is invisible it doesn’t show under the vellum which rocks!!
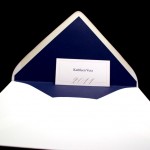
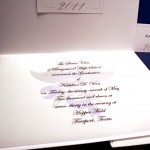
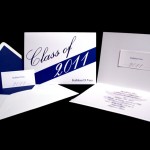


NEXT – I started to use my handy template for envelope liners – traced A7 liners on the midnight paper. Took my tape runner and taped them inside of my bright white envelopes. Ta-da! I also made her name cards to go with her senior pics I took. All in all – paper costs and supplies were 62 bucks! Whoooosh!
This post was written by:
 MIJA VERA - (view all posts by Mija)
Mija has been a designer for the last 15 years. She is a paper obsessed fiend and loves working on new projects while listening to her kids and Maine Coon cat chatter around the house. You can email her at mija@mind-speaks.com
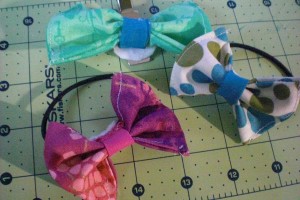
More hair ties!!!! They are the easiest things to make. And frankly, its the only thing I can make with the supplies I have. :/ Bows are super easy to make, if you aren’t a flower person these are a great alternative.
Materials
- two different fabrics (I recommend one pattern and one solid)
- scissors
- thread
- hot glue gun
- starch (optional)
- hair tie/clip
- Sewing machine (optional)
One of my favorite bloggers posted a great version of hair bows.
You will need two rectangles of fabric to construct the bow and then one thinner piece for the middle part. The two hair tie bows measure 6 X 3.5 the hair clip one measures 8 X 3.5. But just play with different sizes, I would recommend starching the fabric the larger you make the bow. (and be careful using the hot glue gun)
Next time I plan to update with something more creative. >.<
This post was written by:
 KIM VERA - (view all posts by Kim)
Kim works as a museum Copywriter and helps out with events from time to time. When she isn’t working or blogging, she is probably off taking a nap. Feel free to email her at kim@mind-speaks.com


 KAT VERA - (view all posts by Kat)


 MIJA VERA - (
 KIM VERA - (


 Email
Email Twitter
 Facebook
 YouTube
 Instagram
 Bloglist Me