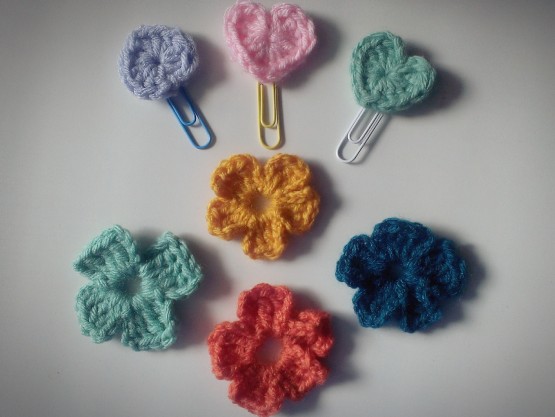
Yarn crafts are amazing and a lot of fun to make. The craft I’m sharing today is great for decorating just about anything. Whether it be gifts, planners, room decor, or hair clips. These small little hearts and flowers are great for all your decorating needs.
Crocheting is something I’ve just recently started getting into. If you’re like me then knitting came much easier to learn. But crocheting allows you to do more shapes and so I’ve been trying my best to learn how to crochet. And I believe I’ve been able to pick it up now, due to the fact that my knitting skills have greatly improved since I first started knitting. I’m not a knitting master by any means, and crocheting is still a mystery to me but I’ve managed to crochet these little hearts and flowers, so these are great for novice yarn crafters or even novice crafters in general. A while back I showed the knitted hearts that I learn to make, but the crochet ones are flat and you can adjust the size depending on the size of hook you use. These can also be used to make garlands that you can hang on the wall. The paperclips are fairly new, I’ve noticed the planner community post something similar on instagram and had to try it out myself. I’ve kept one in my planner for the whole week and it hasn’t moved or gotten in the way. It’s just something small to decorate your planner pages and also be used as a paperclip. Bonus points!
Check back here for some more crochet projects, maybe next time I’ll even make some DIY tutorials and show you how I knit or crochet. Until next time…..
Thanks for reading and commenting.
This post was written by:
 KIM VERA - (view all posts by Kim)
Kim works as a museum Copywriter and helps out with events from time to time. When she isn’t working or blogging, she is probably off taking a nap. Feel free to email her at kim@mind-speaks.com
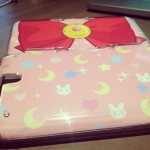
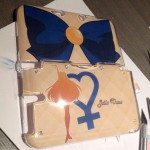
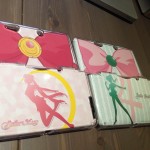
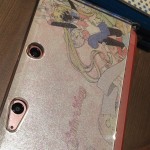
A couple of years ago I started to design Nintendo 3DS custom cases for friends and family. Only recently did I start to show the cases on @mindspeaks‘ instagram account! Etsy store coming soon, more cases to be added along with cases for “NEW” 3DS XL!
That shiny SMASH Brothers case was designed and donated especially for Houston Gaymers to have as a prize for the amiibo SMASH tournament. I will be donating more custom cases to Houston Gaymers to use as prizes soon!
More fandoms in the work: Dr. Who, Monster Hunter the rest of the inner/outer sailor scouts and Animal Crossing cases! If you want a custom case, please comment or use the contact link to talk about a design with me!
This post was written by:
 MIJA VERA - (view all posts by Mija)
Mija has been a designer for the last 15 years. She is a paper obsessed fiend and loves working on new projects while listening to her kids and Maine Coon cat chatter around the house. You can email her at mija@mind-speaks.com
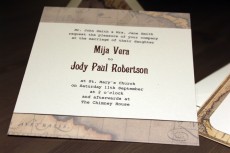
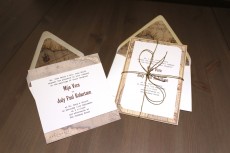
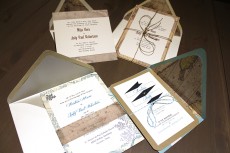
Hey guys, we finished our first workshop at POP SHOP: DIY Wedding this past weekend. I just wanted to share some supplies that I recommend using when making invites!
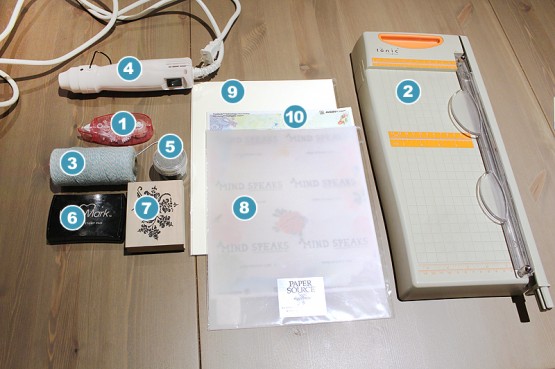
1. Tape Runner. I love love using a tape runner – you can’t feel the adhesive when layering which is awesome. Don’t deal with messy spray glues, the tape runner is perfect and has easy replacement cartridges.
2. Paper Cutter. Why give yourself headaches with scissors or other hand tools. I love my cutters! Random fact: I have 2, one large full size and a travel size cutter.
3. Bakers Twine. Nowadays you can pick this up anywhere in variety of colors. Etsy and Paper Source carry them in different colors!
4. Heat Tool. I have a Martha Stewart heat tool for embossing. You can get these at Hobby Lobby, Michaels and Paper Source. Hint hint if you want a pretty teal one go to Paper Source!
5. Embossing Powder. You can get a variety of colors and brands of powders. Depending if you want a metallic, glitter or plain solid colors – you can find them all at Paper Source. Make sure it is labeled EMBOSSING POWDER. Usually comes in a small container and sorted near normal glitter so read the label carefully. You can save on powder and reuse the excess with the help of a tray to catch any extra powder.
6. Ink Pads. OK This is the most important item on this list. In order to emboss correctly you want SLOW drying ink! I almost only ever use Tsukineko’s VersaMark. You can get this amazing ink pad at JoAnn’s, Michaels etc… The slow drying ink pads are usually with a black case. We want slow to give you enough time to apply the powder and add heat to the design.
7. Stamps! Rubber stamps are addicting to collect and fun to play with.
8. Vellum Paper. For creative layering and helps add elegance to your piece.
9. Card Stock. I love combining soft white or off white text paper with kraft cover paper. You can play around with colors and weights.
10. Full Sheet Labels. You can buy full label sheets and print out your address labels. I cut mine into strips which you can see here.
Remember, if you have any questions about
Wedding info drop us a line under the contact section! I will try to ask any questions that you might have. That is about it!
Stay tuned, we have some cool news coming with an awesome giveaway – join our mailing list for up to date news!
This post was written by:
 MIJA VERA - (view all posts by Mija)
Mija has been a designer for the last 15 years. She is a paper obsessed fiend and loves working on new projects while listening to her kids and Maine Coon cat chatter around the house. You can email her at mija@mind-speaks.com
 KIM VERA - (view all posts by Kim)


 MIJA VERA - (


 Email
Email Twitter
 Facebook
 YouTube
 Instagram
 Bloglist Me